Wednesday 31 August 2016

Decorated Princess Doll Picture

Hello everyone..

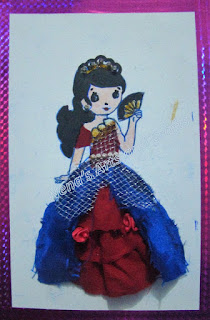
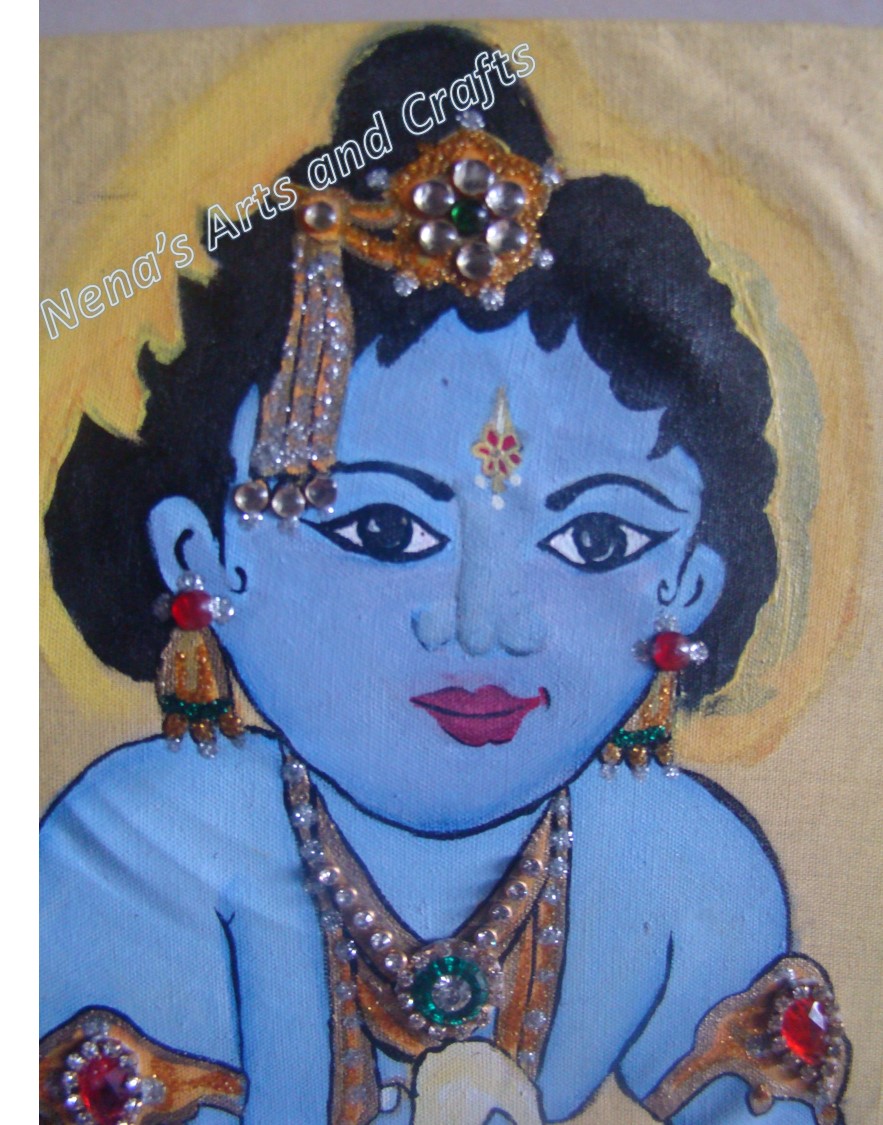
Today I have posted a doll picture dressed up with satin and flanel cloth.. And it is also decorated with glitters, stones,etc.,


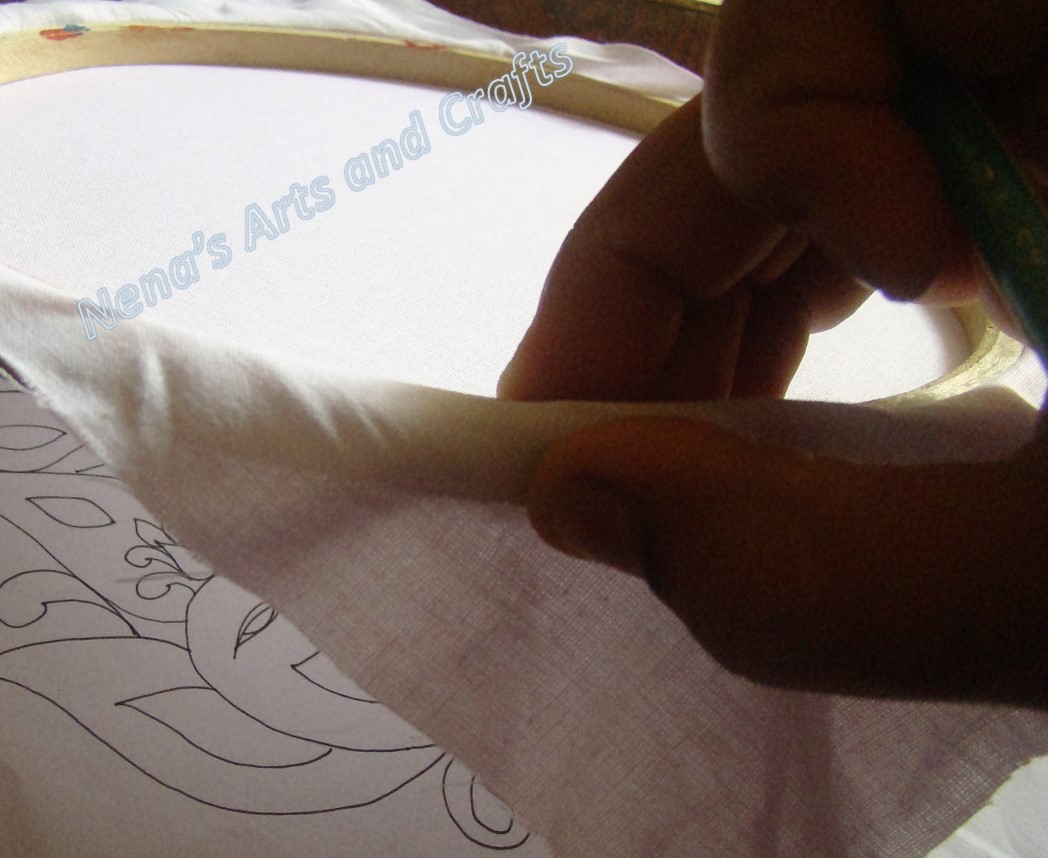
This can be used as a wall hanging or in greeting card,etc., The pattern is traced onto a card..


For the inner frills, THreee flanel cloths are cut with measurements as follows in inches
  • 4*1.5
  • 3*1.5
  • 2*1.5
Now for each of the cloth, a runnning stitch is put on one end.. when pulled out it forms a fan like frill..

All three frills are stitched on one another and pasted on the doll picture..


Now for the outer layer of a gown. A satin cloth is cut in the same size and pased along the corners of the gown..


A small part of the flanel cloth is pasted on the top part of the gown.. In the bottom part, a shimmery net fabric is pasted..

Now the doll is decorated with stones and glitters..and colored with a marker pen..

When we border the picture with a glitter tape,The finished picture looks like this..

Thank you for reading my post.. Please visit again and leave your valuable comments.. Hope you enjoyed this post.. See you soon with another artwork.. Have a nice day..

Saturday 27 August 2016

Art form waste-Sauce dip gift box-Pista shell tulip flower

"Keep on recycling and carry on Reusing"-Recycle quote

Hello everyone..

Today I have posted two tiny arts made from things we usually throw away..
  1. A tiny gift box
  2. A single tulip flower pot
A tiny gift box:
What do we do with all the sauce dip cups that comes with pizza?.. It mostly goes along with pizza box into waste.. But when well cleaned and with tiny creativity, it can be made as a gift box for small things like keychains, rings, earrings, etc.,

I have decorated the lid with sequins and a bead at the center..


For the side, I have rolled a glitter tape around it.. Simple..Isn't it?


Now our gift box is ready for our tiny gifts..


A single tulip flower pot:

This tulip flower is made by pasting empty pista shells on one another. with fabric glue.. Hot gun glue can also be used...The stem,leaves and sand are made from shilpkar/mseal and colored with green acrylic paint..


The flower pot is also a sauce dip box with separate lid.. Only the cup is taken and painted brown acrylic paint on its inner surface..


Thanking you for visiting my blog.. I'd love to hear from you.. Please leave your valuable comments..

Hope you enjoyed my post.. See you again with another artwork.. Have a nice day..

Friday 26 August 2016

Glass color painting on an OHP Sheet-DIY- Cute Rabbit

"The world is like a looking glass.. It gives back to every man a true reflection of his own thoughts.."-Thackery

 Hello everyone..

After a wonderful week full of work and wonders of celebrating Janmashtami.. Here comes a painting for kids..Its a colorful painting of a cute rabbit done on a OHP sheet using glass colors..


It is very simple and colorful and so it will be a wonderful artwork to do along with your kids.. You can do the outlining and your kids can pour the colors..

NOTE:

The most important thing to note here is Time.. Time is an essential concern while using glass colors because each step in this painting needs time .....

The outliner needs atleast 3 hours to dry.. For filling colors,  it is advisable to wait for each color to dry for atleast 25 mins before we pour the next color. In case of blending two or more colors, the amount of the color needed to create the effect has to be carefully decided before pouring the glass color on to the surface... Mixing of unwanted colors is a waste of time and energy as we have to repeat it after carefully cleaning them..

Things needed:
  1. OHP Sheet


  2. Glass colors


  3. A safety pin(To burst air bubbles)
  4. An old cloth(To wipe the nozzles of the glass colors)
Pattern:

The pattern of this rabbit was traced from a 20 year old greeting card.. Often, our itsy bitsy treasure trove will provide us wonderful surprises..


An OHP sheet is placed on the pattern and the outline is done with glass outliner black color..


The golden yellow and cherry red colors are blended for the rabbit's body and pink and golden yellow colors are blended for the flowers.... All other colors for leaves (Green) and the center fur(Brown)and black color for eyes and nose are filled..


The finished painting looks like this....


Thank you for visiting my blog..Please leave your valuable comments below..
Hope you enjoyed this post..See you soon with my next artwork.. Have a nice day..

Thursday 25 August 2016

Pencil Drawing-Krishna-Meenakshi

"God always has a bigger plan for us than we have for ourselves"-Famous quote

Hello everyone..

Today afternoon, I remembered drawing a pencil sketch of Lord Krishna and Goddess Meenakshi long back,.. After an hour of severe search operation in my artwork treasure trove, Voila... Got it and here they are..

This krishna was the cover painting of a kids story book..

A closer look..


This meenakshi was found as a calendar picture..


A closer look..


 Hope you enjoyed this post.. Please leave your valuable comments below..

See you soon with my next post.. Have a nice day..


Wednesday 24 August 2016

Fabric painting-Krishna Portrait


"A Gift is pure when it is given from the heart to the right person at the right time and at the right place and when we expect nothing in return"

Hello everyone..

A very happy and prosperous Janmashtami to all of you... On this auspicious day, I have painted a portrait of Lord Krishna..

I have painted Little Krishna with acrylic colors by Blending technique.. and decorated with stones,golden strings and glitters..


A closer look..


Please leave your valuable comments below..

Hope you enjoyed this post.. See you soon with another artwork in my next post.. Happy Janmashtami once again.. Have a nice day..

Tuesday 23 August 2016

Crafts-DIY Krishna Flute/Bansuri

"Life is like a flute.. It may have many holes and emptiness.. But if you work on it carefully, It can make magical melodies.." - Famous Quote

Hello everyone..

Every year, one of the highlights of Janmastami is the tradition of dressing up our children as Krishnas and Radhas..In this post,I have made an easy DIY Bansuri/Flute for all the little Krishnas in your houses..


Things needed:
  1. A hollow pipe(like old wall calendar and such)
  2. Color paper
  3. Shilpkar/mseal
  4. Decor items like beads,sequins, etc., of your choice

First take a pipe of size of about 10 inches(Actually, it can be of any size according to your need..)


The next step is to cover the edges with mseal/Shilpkar we can make any curvy edge that we want....  Let it dry for atleast 3 hours..


Now roll a color paper on it and stick it with glue..


Now, we can decorate the flute either with paper tape or golden ropes.. For illustration, I have rolled both of them.. But any one of your choice will suffice..


Color the edge with any dark color... I have used pearl metallic rust..


Decorate with stones and sequins.. add three strands of pearls


 A closer look..


The bansuri is up and ready for your little krishna to play..

Please let me know your thoughts through the comments section below. Subscribe to my blog and  my new posts will reach your inbox directly..

Hope you enjoyed this post.. See you soon with another artwork...Have a nice day..


Crafts- Krishna set

"Let not the fruit of the action be your motive to act"- Bhagavat Gita

Hello everyone..

On the occasion of Krishna Jayanthi/Janmashtami,(Birthday of Lord Krishna which is on 27 Aug), I have posted a full krishna decoration set for children..

First comes the wonderful flute of Krishna(Bansuri in Hindi) ..It is made from a hollow PVC pipe which is cut from an old wall calendar..and decorated with maroon satin ribbon,golden paper, beadstring, a disco rope and golden outliner.. Some beads are added to one end..

The crown and peacock feather are bought from shop and taped together..


The Arm and wrist decorations are made with a cardboard and decorated with kundan stones,stone lines,silver paper,beadstrings,half pearls,etc., Satin ribbons are pasted on the back ..


The pearl chain is a single piece in which two bead chains are attached.. One is a small black chain and another is made of big white and golden pearls..


The full set..


Please let me know your thoughts through the comments section below. Subscribe to my blog and  my new posts will reach your inbox directly..

Hope you enjoyed this post.. See you soon with another artwork...Have a nice day..

Friday 19 August 2016

Fabric painting-Blending-Regras de casa

"Love is the flower you got to let Grow"-James lennon

Hello everyone..

Last week I came across many wonderful youtube videos on drawing flowers on fabric..Inspired by those incredible videos, I too attempted one of them..

Please take a look..


Click here to view the original video..

Hope you like this post.. Please leave your comments below.. See you soon with my next post.. Have a nice day..

Fabric painting- Blending -DIY-Peacock

"If you could see yourself the way that others do, you'd wish you were as beautiful as you"-Jon Bon Jovi

Hello everyone..

Today I have painted a peacock using Blending technique, on a White poplin Fabric..


Things needed:

A clean and ironed Poplin Fabric:
Poplin is a fabric woven with criss cross ribs of any fiber such as cotton,wool,silk,etc., which gives it a strong texture and it prevents any paint from oozing down through it. White poplin works well with most acrylic or fabric colors but any color fabric is fine. Buy Poplin cloth here

Paints:
Many different colors of fabric/Acrylic paints>


Painting Brushes:
  1. A Flat Brush No:2 or 3(For color filling)
  2. A lettering Brush No:000 or 00(For outlining)


Short and Stiff bristles are preferable..

Painting Frame:A painting frame helps to tighten the fabric and holds it in the stretched form, so we can paint on it easily...


Other Essentials:
  1. An old cloth for cleaning brushes in between changing colors
  2. An old piece of card or paper to place under the fabric
  3. Clean water
  4. A mixing tray(Optional in case we want to mix certain colours)
Pattern:
For this painting, I have traced the pattern by placing the fabric attached on to a frame upside down upon the peacock pattern on the paper..


Now fill ultramarine blue acrylic paint as base color, place small spots of white and blend it with the base blue color..


Light Green color is filled as base color for the feathers and blended with lemon yellow color..


For the center part of the feather, place a spot of blue and yellow on each inner feather.. When we blend yellow with blue.. It also forms green color but the effect looks good..


For the peacock's body and other designing parts, fill with lemon color base color and blend with brown color..


Outlining is done with black..


The finished look..


It seems my peacock is upset about something.. isn't it? May be I might have tested its patience by making it pose for my painting...

Hope you like my post.. Please leave your comments below.. See you soon with my next post.. Have a nice day..